
New Haven Alco Switcher Low Profile Cabs
- Scale: HO
- Designed from drawings and photos in NHRHTA Shoreliner Vol. 35 No. 1 and other photos
- Two versions designed to fit HO Proto 2000 S-1 and HO Atlas Master Line and Atlas/Rocco S-2.
- One piece versions have been developed for printing on a resin printer.
- One piece cabs may be purchased for $48 each including a clear styrene window, upper rear grab and handrails plus $8 USPS Ground Advantage shipping. Combined shipping offered. Please Contact me to order.
- I do have these additional parts available for purchase. Contact me to order.
- Custom Finishing 103 whistle $7
- Micro LED to light the lens w/ resistor $5
Prototype Cabs
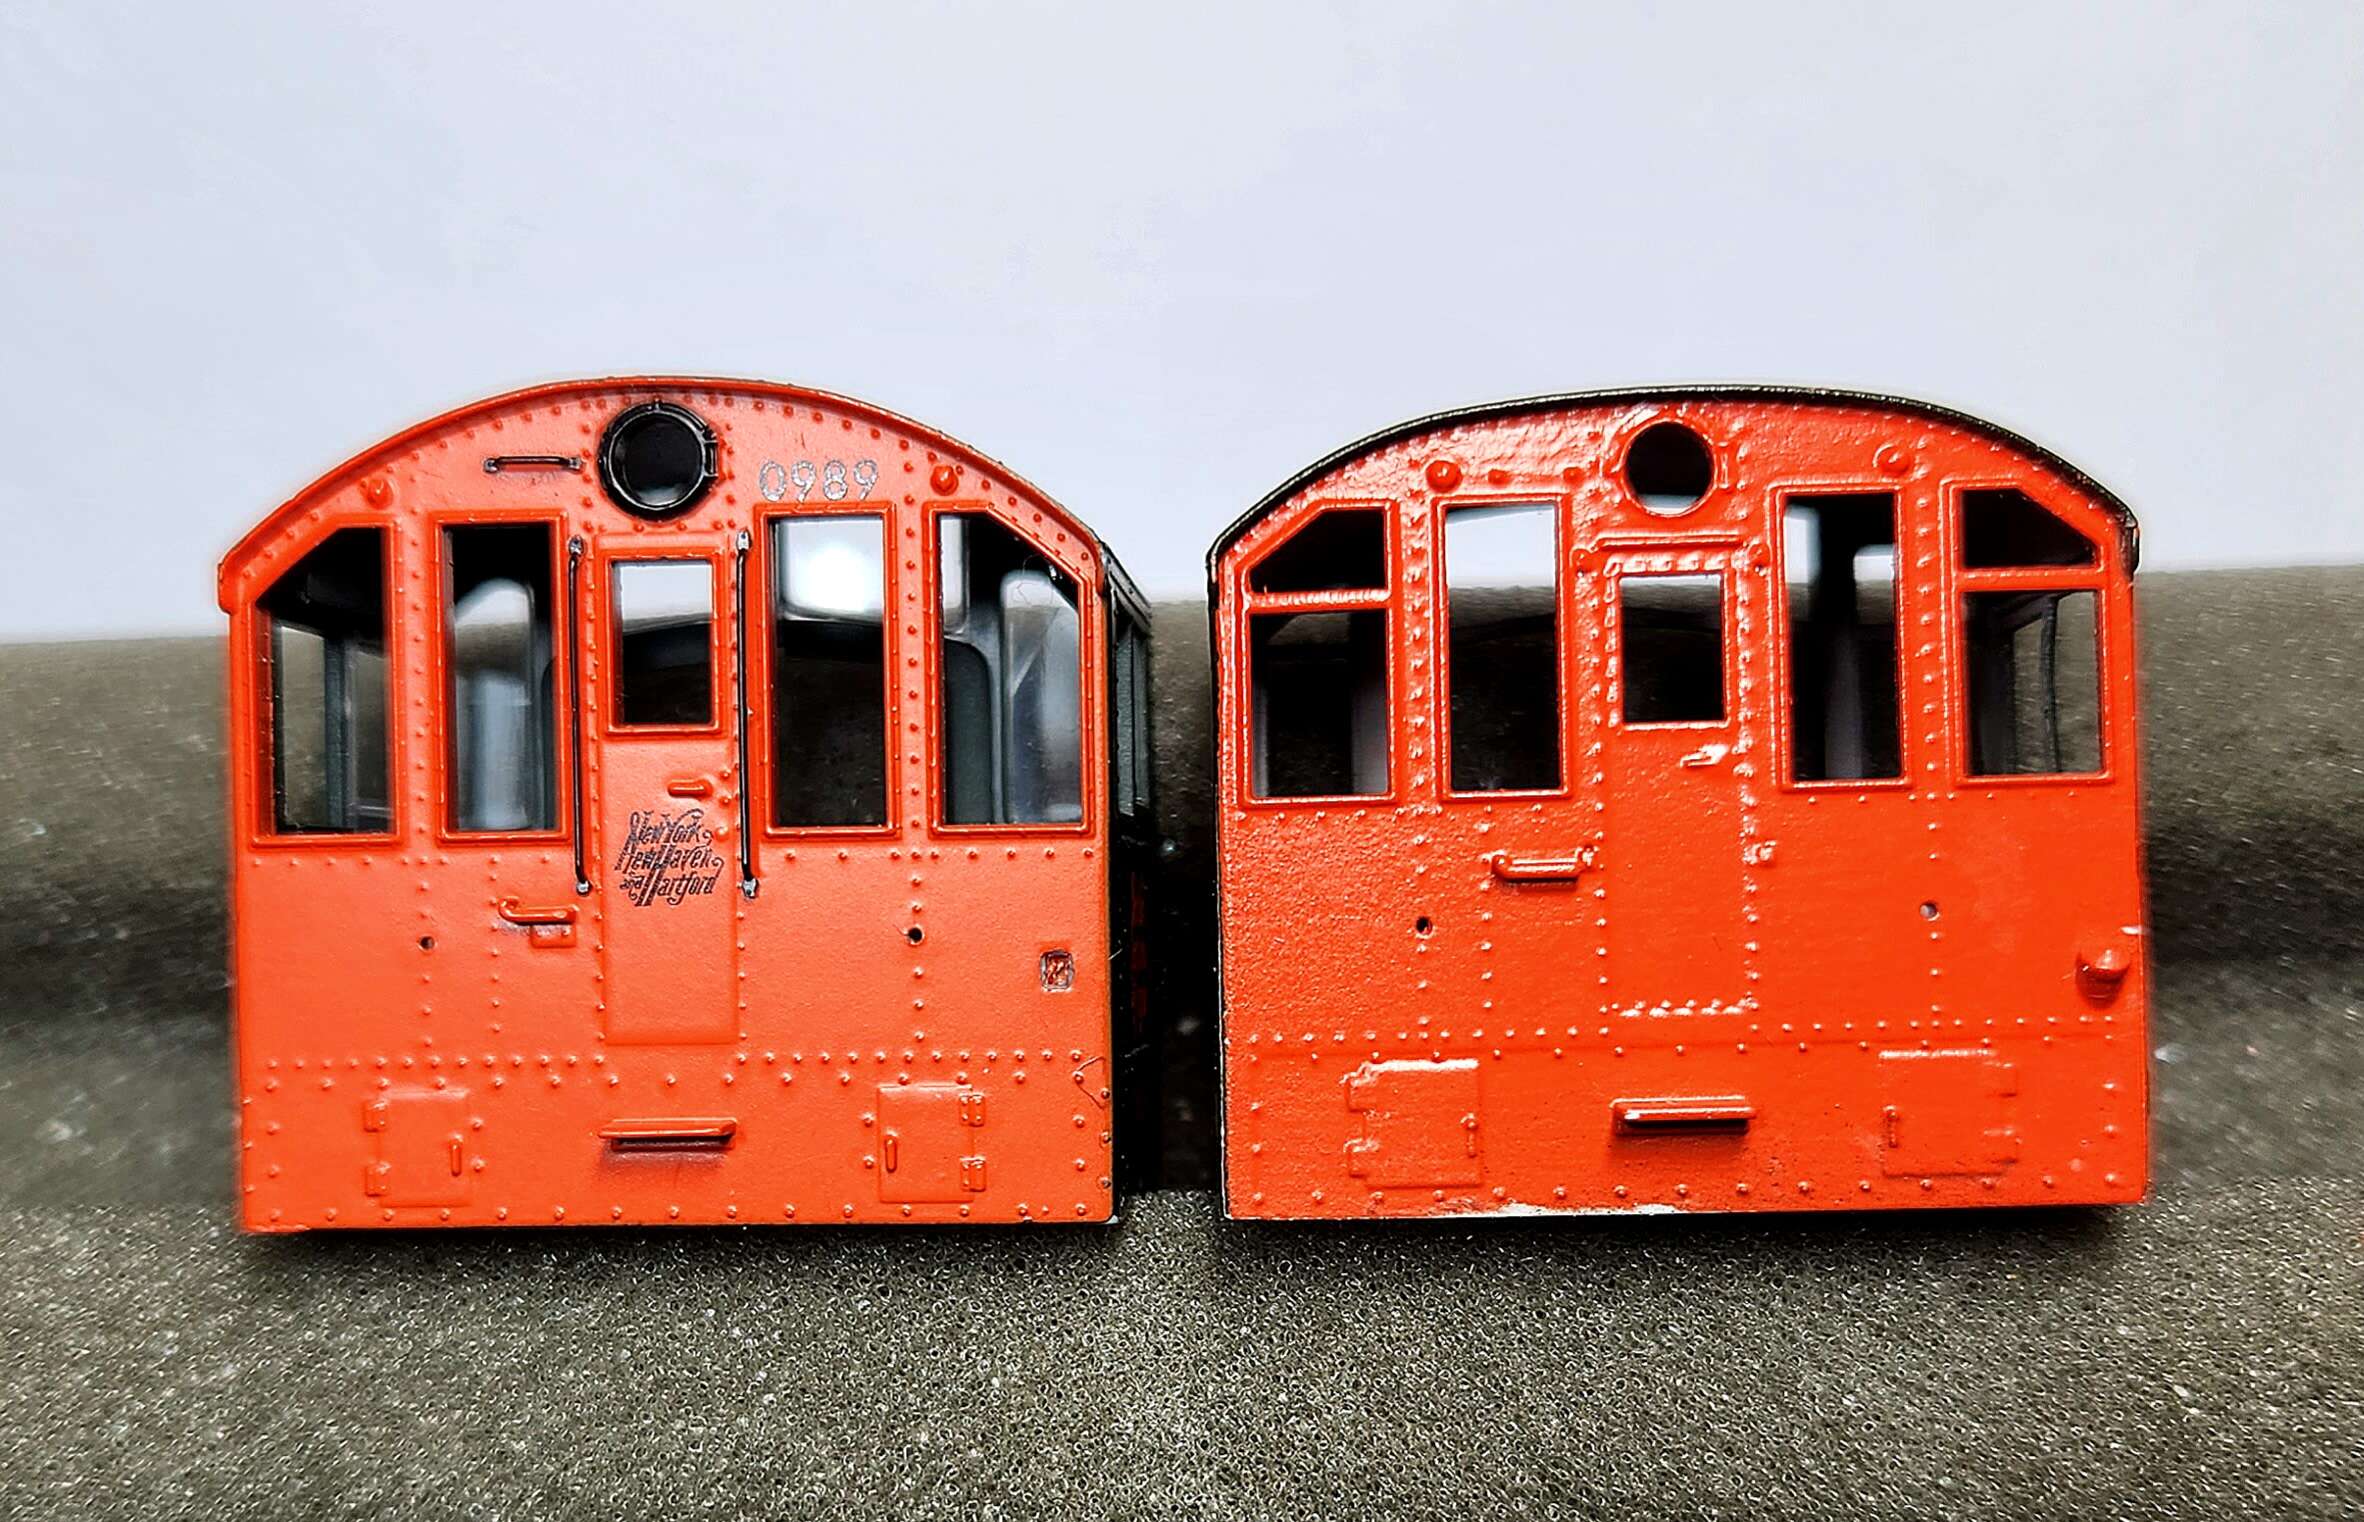
When the New Haven ordered their S-1 and S-2 Alco switchers the cabs were modified to provide greater clearance under the catenary where the lines were electrified. The roofs of the cabs were lowered by about six inches by using compound curves for the roofline with a broader radius in the center of the cabs.
The photo above/to the left compares the stock Proto S-1 cab with the low profile cab. The difference in the roofline is easy to see. There are also some differences in the windows and the light at the top rear of the cab.
I made he thin roof overhang on the front of the cab longer. I suspect the molds for the stock cabs couldn’t be made to mold a long thin roof overhang.
Prototype Cab Information
NHRHTA Shoreliner Vol. 35 Issue 1 has a very extensive article on the New Haven DEY-3 (S-1) and DEY-5 (S-2) Alco switchers. The article was written by Marc J. Frattasio & William S. Chapin. If you’re thinking of making your S-1’s or S-2’s match the New Haven’s you need to find or purchase this issue of the Shoreliner. Last I checked it was on sale in the NHRHTA Readville Shops.
This article provided enough information and photos to design the cabs. Most importantly the article included an elevation drawing of the cab back that showed the lowered roof with full scale dimensions, including radii and arc lengths for the compound roof curves.
This was just the information I needed to start my design. I was really excited because New Haven modelers had been asking how to model low profile Alco switcher cabs for years.
Designing Model Cabs
Cab Back
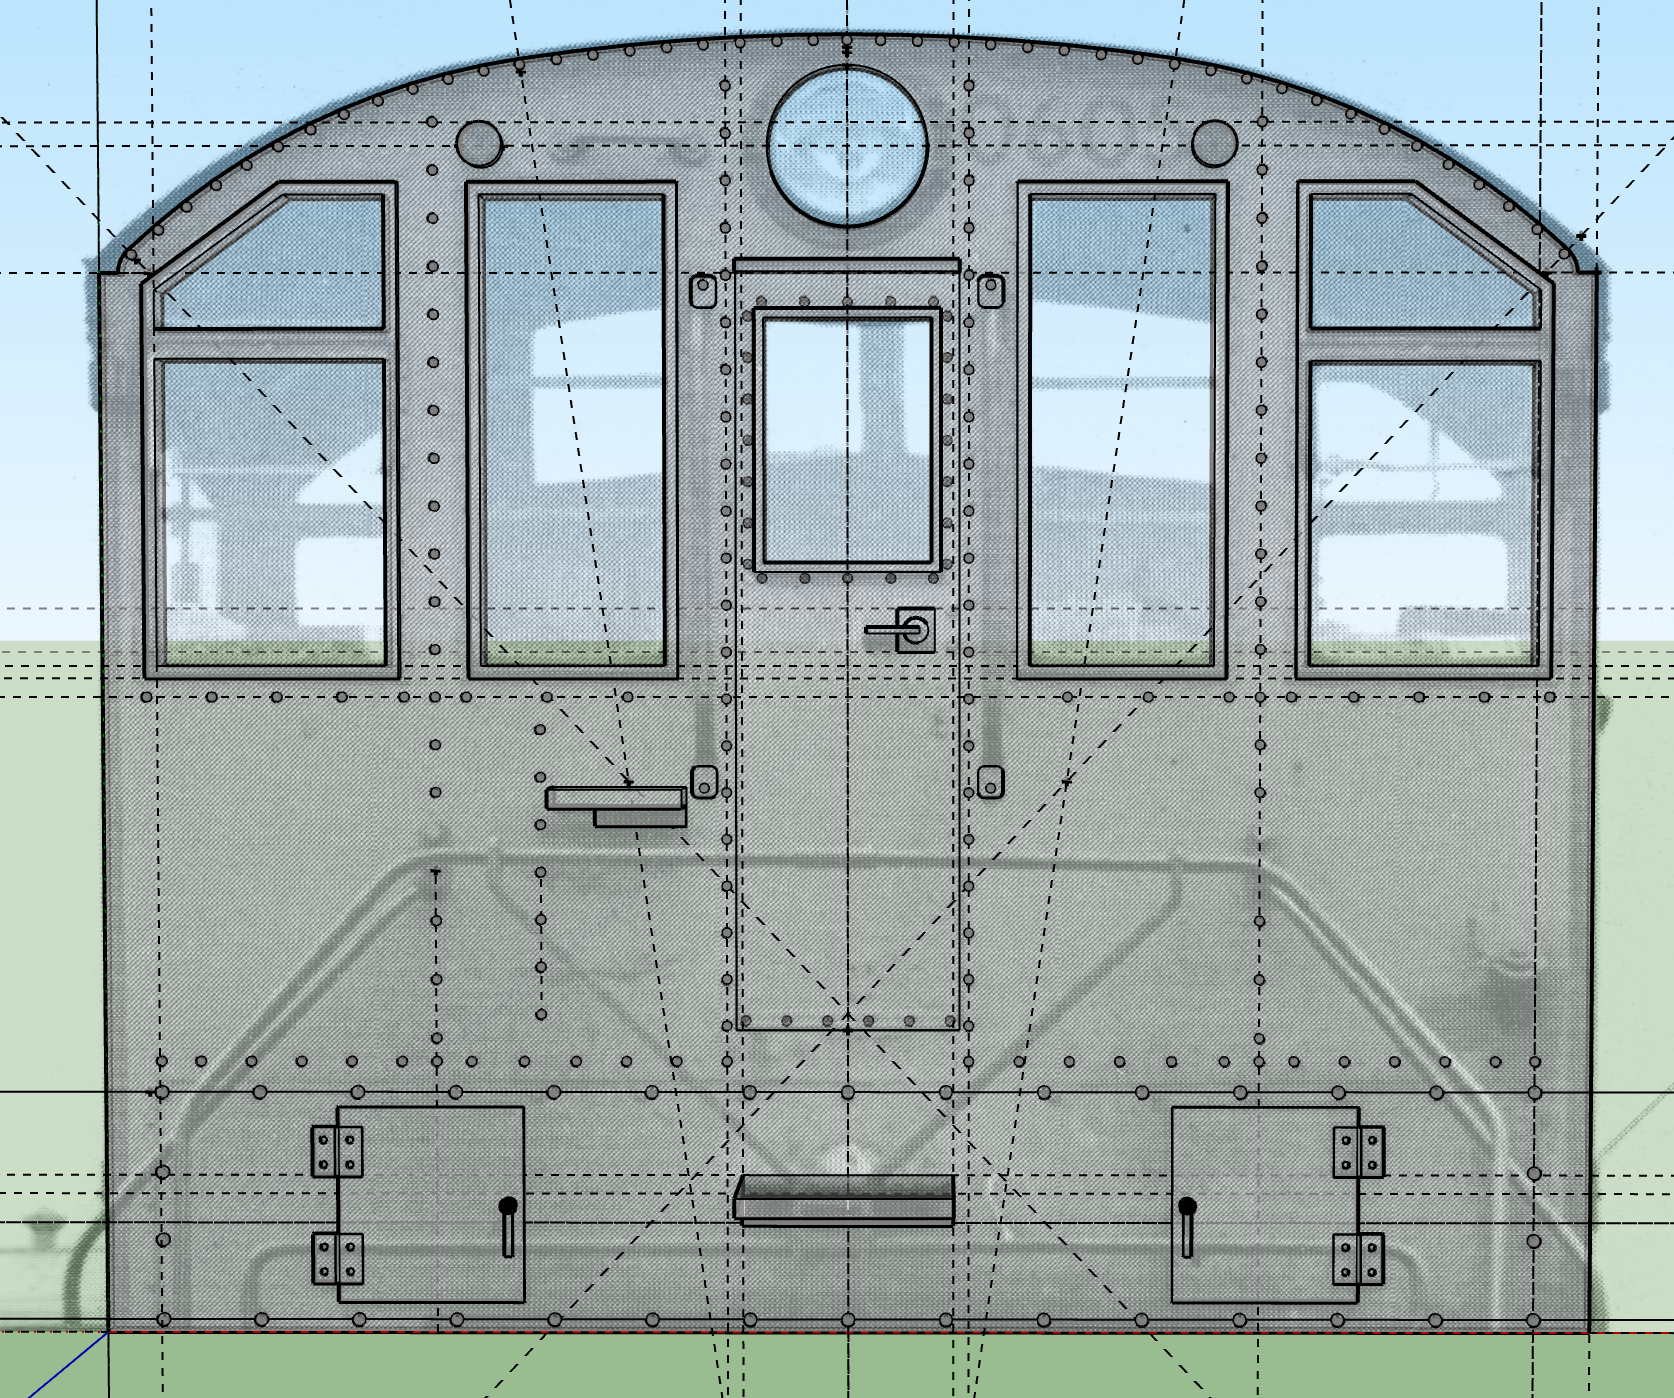
I started by scanning the photo from the article and importing it into Sketchup. Then I scaled the photo to match the full scale dimensions on the diagram. Next I started laying out the curves for the roofline.
I could overlay straight lines for the windows, the door, and their frames. I created components for the rivets and placed them onto the back in the correct positions matching the rivets in the photo. You could say I’m a rivet counter.
Cab Sides and Front
For the design of the sides I used photos of the sides, squaring them up if necessary by using “Perspective Warp” in Photoshop. I similarly outlined the windows and added rivets.
For the cab front I placed the rear of my Proto 2000 S-1 hood on my scanner and scanned it so I could match the radius of the curve at the top of the hood to the cab front. I didn’t have any detailed photos of the fireman’s door on the cab front, so I asked Chris Adams, the photo archivist for the NHRHTA, if he could find a photo of the cab front fireman’s side door and send it to me. I had to square it up with Perspective Warp, but then I had the information I needed to design the cab front.
Cab Roof
I wanted to make the thickness of the roof match the prototype so it could be as accurate as possible. I measured the roof thickness on the diagram. It was close to an inch. I made the roof 1 1/16″ thick. The overhangs for the roof on the front and back of the sides were also made 1 1/16″ thick.
Cab Window Openings
I made the sides, back and front match the thickness I measured on the stock cab so the new cab would fit onto the shell and chassis the same as the original cab. I made an area around the window openings thinner so a piece of .010 clear styrene could be cut to the size of the opening. This would allow mounting of the clear window material “closer to flush.” That was the best I could do because I wasn’t molding clear plastic material for windows.
Fixing Design Problems
Five Piece Cabs
After I uploaded a one piece cab I discovered I needed to print the cab at Shapeways as five parts with the visible surfaces face up to maximize detail.
I uploaded a one piece cab design to my Shapeways shop so I could show it to my son. It was marked for sale so my son could see it. I also added some comments that it wasn’t ready to be sold yet.
NHJJ4 from the NHRHTA Forum discovered my one piece cab for sale in my shop and ordered two. There was a long discussion on the Forum after that. We discussed a lot of design issues including splitting the cab into five pieces.
Adjusting Dimensions
The first print of the five piece cab was way too thin. I had to add more thickness to the upper parts of the sides, back and front, plus make the roof thicker inside the cab.
I had to make the cab for the Proto 2000 S-1 2″ scale inches taller to make the fit of the curve at the top of the hood a little better. After that I sold quite a few five piece kits printed by Shapeways.
How to Build Using the Model Cabs
If you purchase a Shapeways printed cab kit please follow the instructions in the Cleaning and priming Shapeways printed parts blog post. Then assemble the cab following instructions in the How to assemble five piece cab kits blog post.
I haven’t heard of many modelers that actually assembled the cabs and built models using them. Joe Smith did a great job building an S-1 for his Berkshire Line layout. He describes his build in an article in the Speedwitch, the NHRHTA periodic modeling magazine, and his blog here.
Joe is an excellent modeler. If you have purchased a Shapeways printed cab kit you should take a look at Joe’s article for some guidance with the build.
Printing One Piece Cabs on a Resin Printer
Now, almost five years later things have changed quite a bit with 3D printing. When prices dropped to $500 for high resolution mSLA resin printers, I bought an Elegoo Saturn resin printer in late June 2021. At first I was busy trying to learn how to print some other simple projects like the S-1 narrow radiator shutters described on another page.
As a test I tried printing a cab back tilted at an angle. I was amazed at how smooth the finish was compared to Shapeways printed parts. Design requests for others kept me busy for a while, but I finally got back to printing cabs in spring 2022.
At first I tried printing the five piece cabs I designed to print at Shapeways. The parts were difficult to assemble because there was some warping. I tried some different supports, adding some structural ribs and orienting parts differently to eliminate the warping.
I went from five parts to two and finally to one. I continued correcting warped parts by adding and adjusting supports and adjusting the print orientation.

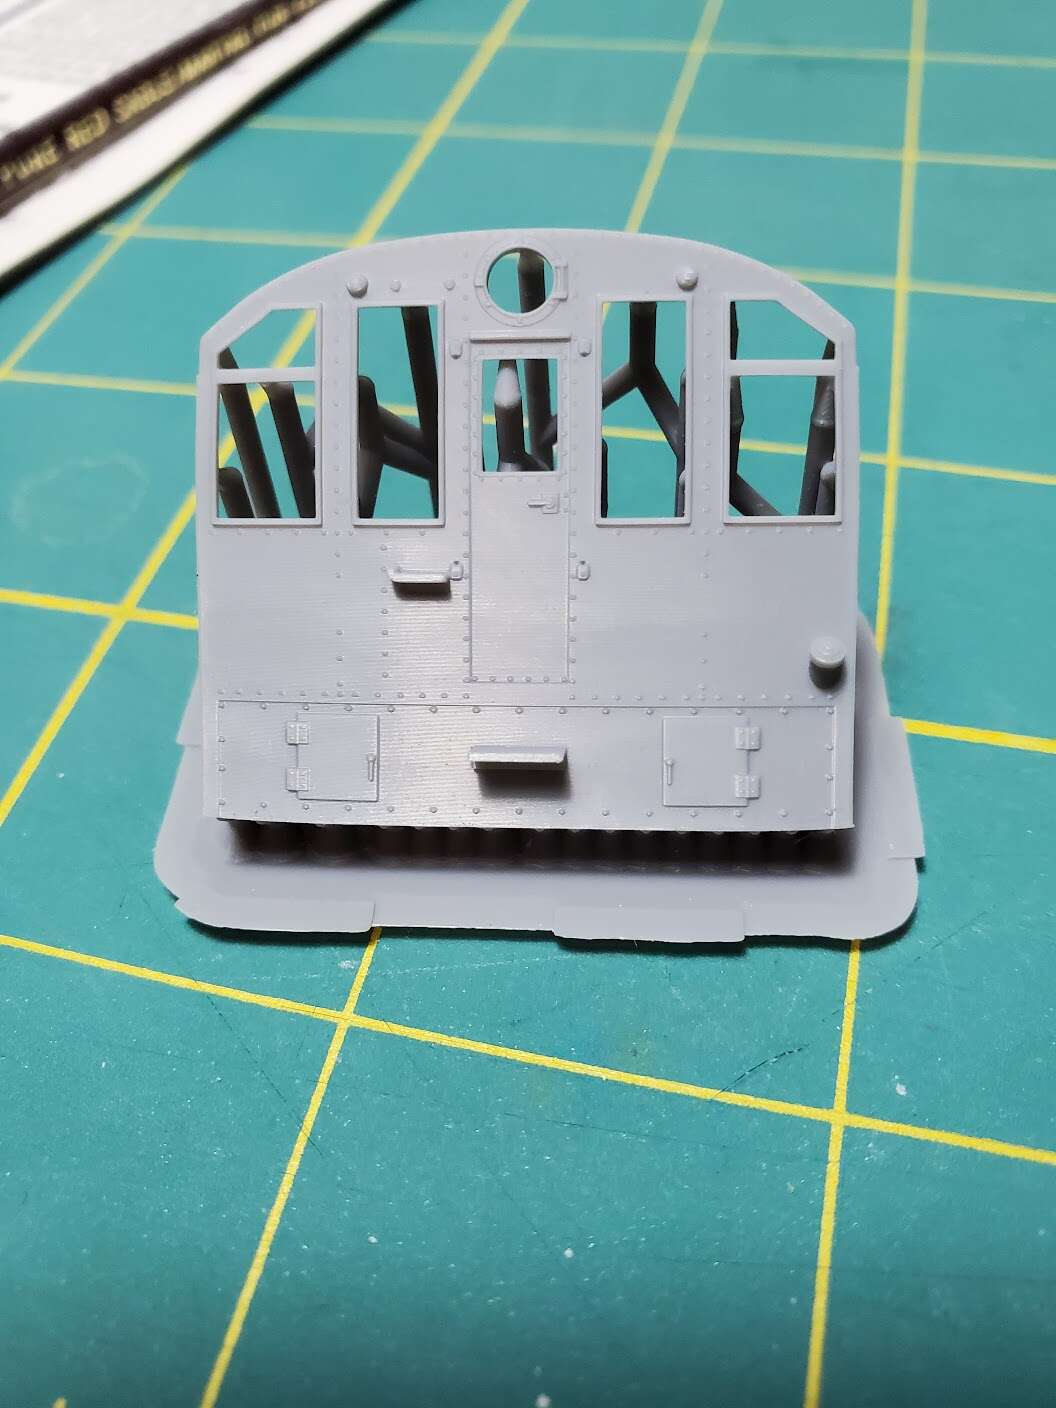
One Piece Cabs Printed on a Resin Printer Now Available
Pictured here is the current state of the resin printed one piece cabs. I expanded the builder plates after Chris Adams discovered the plates were too small for the Microscale Alco builder plate decals.
Next I eliminated warping at the front to side joints and at the roof to side joints.
The last piece of warping I eliminated was the slight droop of the front roof overhang. I eliminated it by adding an array of small supports under the long roof overhang and curing the cabs with the supports still attached for 30-50 seconds before removing the supports.
I added an armrest to the engineer side window and added a rib to the firemen side window divider for structural strength. Adding the armrest and rib required redesign of the clear styrene window set.
The last change I made to the S-1 cab was to eliminate the bolts to the left of the rear light housing and adding pilot holes to be drilled so the grab from the original Proto 2000 cab can be installed. The bolt details on the grab are much better than using a plain grab.
If you’ve misplaced the Proto 2000 grab from the original cab, I’ve created a version of the S1 cab that adds bolt detail to the printed cab on either side of the hole. I also offer a plain grab to fit this cab with the printed bolt detail.
The grab from the original Atlas S-2 is just a plain grab. Pilot holes next to the printed bolts have been added to install the plain grab from the original cab.
If you misplaced the Atlas S-2 grab I can supply a grab to fit the Atlas S-2 cab free of charge.
The Atlas S-2 cab also fits the old Atlas/Rocco S-2 that has cast on grabs. If you are purchasing an Atlas S-2 cab for this model I provide a wire grab to fit the cab free of charge.
I now provide the wire handrails for the rear of the cabs. I recently increased the price of the cabs from $45 to $48 to cover the cost of the handrails.
Additional resources for modeling New Haven Alco S-1 and S-2 switchers
- Joe Smith’s Blog about building a Shapeways-printed five piece DEY-3 cab
- Chris Adams’ Blog for Modeling DEY-5 #0604
- Chris Adams’ Blog for DEY-3 #0957
- New Haven’s DEY-3 / DEY-5 Switchers by Marc J. Frattasio & William S. Chapin NHRHTA Shoreliner Vol. 35 Issue 1
- New Haven Diesel Locomotives Volume 1 Switchers and Road Switchers by Robert A. Liljestrand & David R. Sweetland
- New Haven Power by J. W. Swanberg, Alvin Staufer, 1988